
How to Build a Design System in Claude Design: 7 Steps
A step-by-step design system workflow based on the carousel by uiux.subash.
A design system is easier to generate when the source material is organized and the result is tested against a real screen. The carousel presents a sequence in Claude Design: choose an organization, add design references, generate the system, review it, test it, publish it, then continue improving it. This is more useful than asking an AI to invent a brand system from a blank prompt because each stage gives the next one better evidence.
The workflow below focuses on the decisions that keep a generated system grounded in your actual product. Product interfaces, brand assets, and design constraints should guide the output. The exact controls in Claude Design may change, so treat the steps as a method and confirm current features in the official Claude Design product.
Step 1: Set up the right workspace
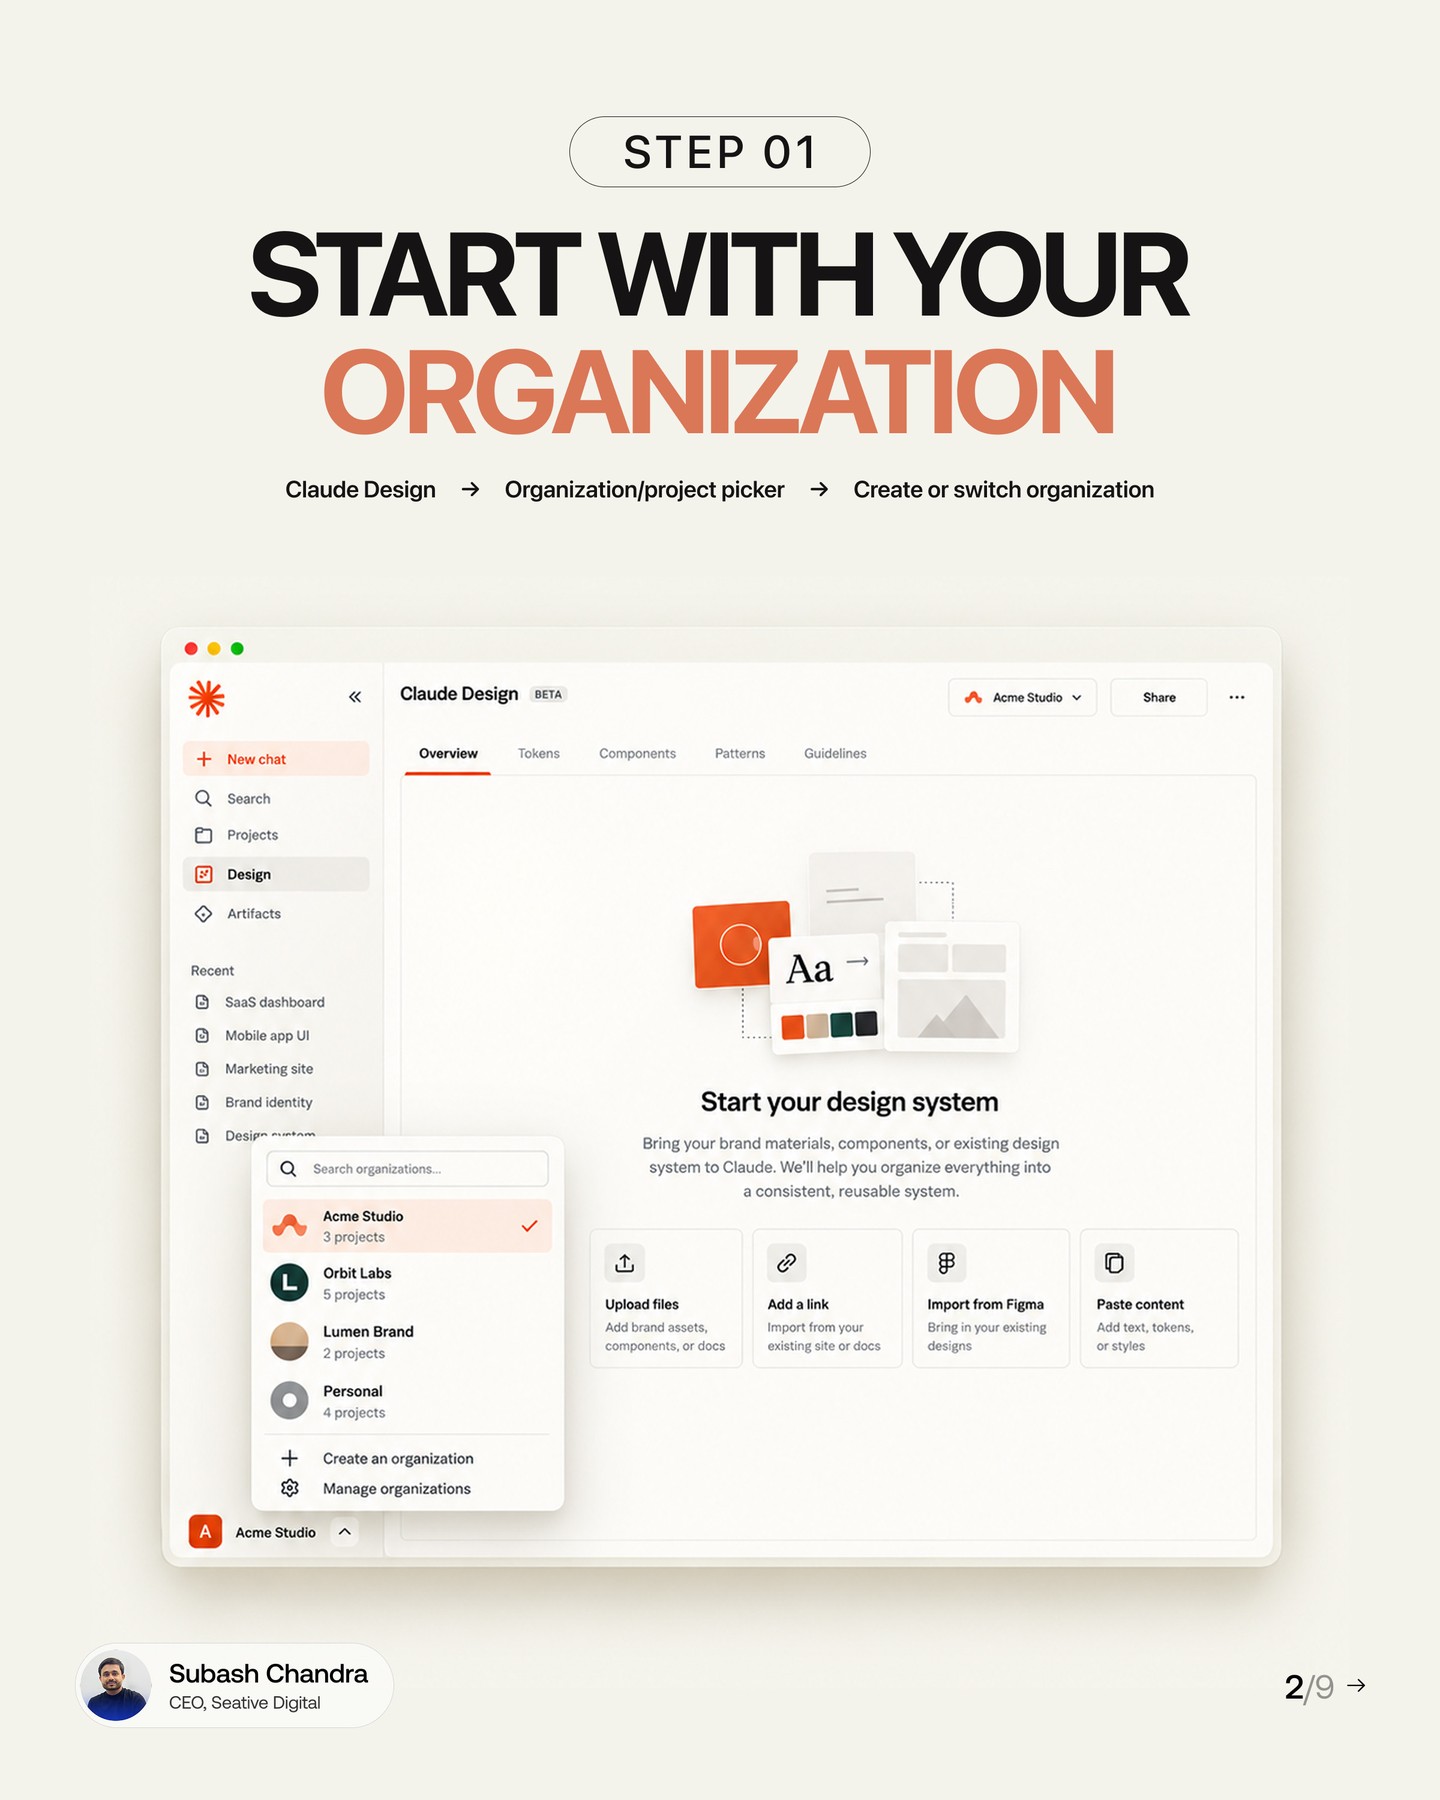
The first screen starts by creating or switching to an organization. Set up a workspace that matches the project and the people who need to review it. Before adding assets, decide whether this is a new product, a redesign, or an extension of an existing brand. That context changes which references are relevant. Avoid mixing unrelated client work in one system, since the model may infer patterns that do not belong together.
Step 2: Add references that reflect the product
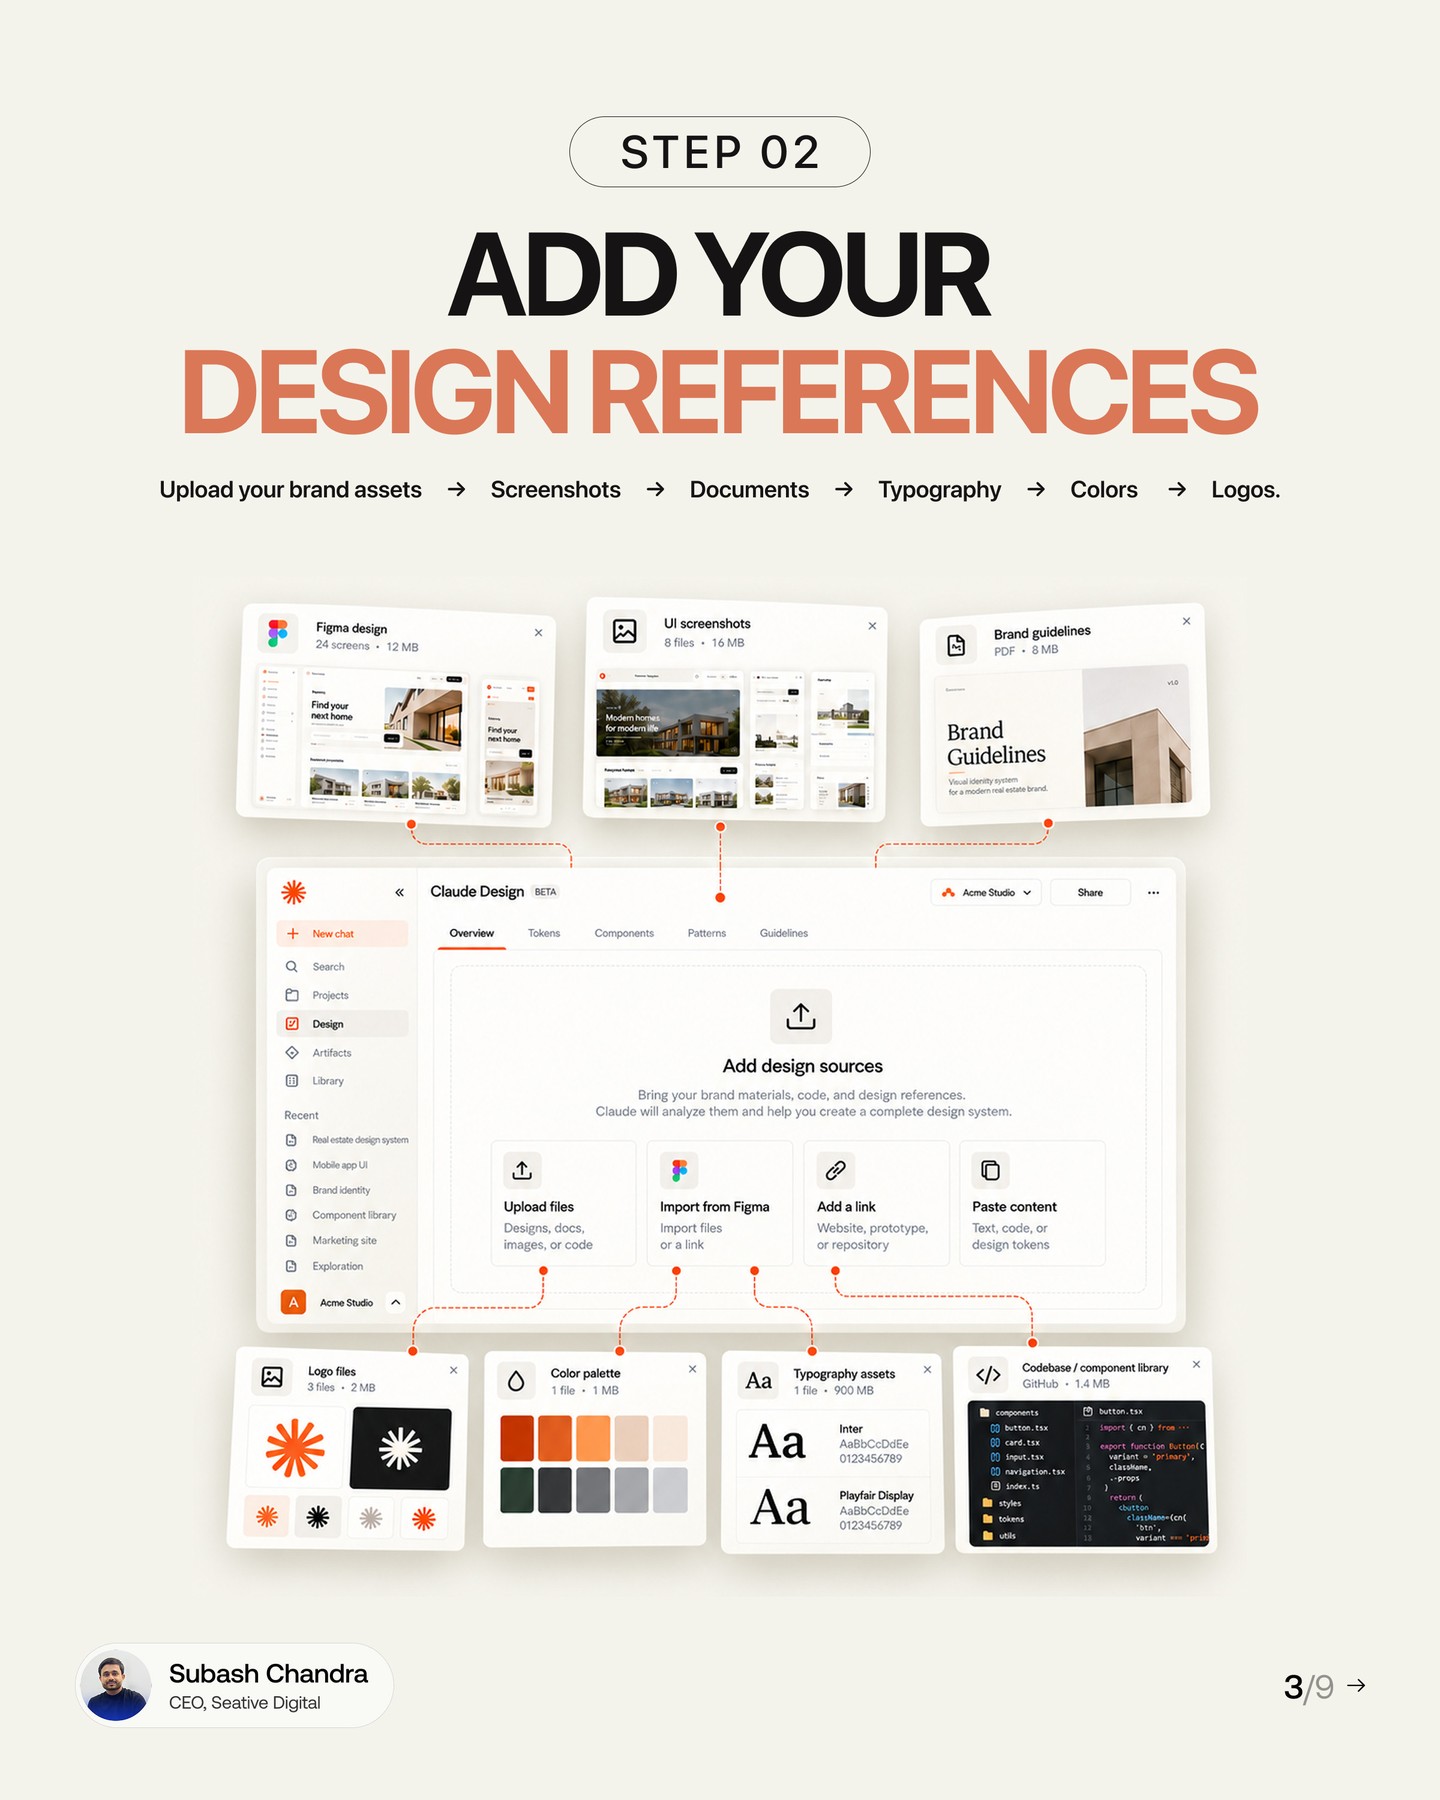
Bring in the strongest available references: brand guidelines, existing interface screenshots, component libraries, typography, colors, and logos. The carousel shows uploads, Figma import, links, and pasted content as possible inputs. Favor current, approved material over old explorations. If sources disagree, label which one is authoritative. Remove private or irrelevant content before uploading, and make sure you have permission to use the files in this workspace.
Step 3: Generate a first system from those inputs
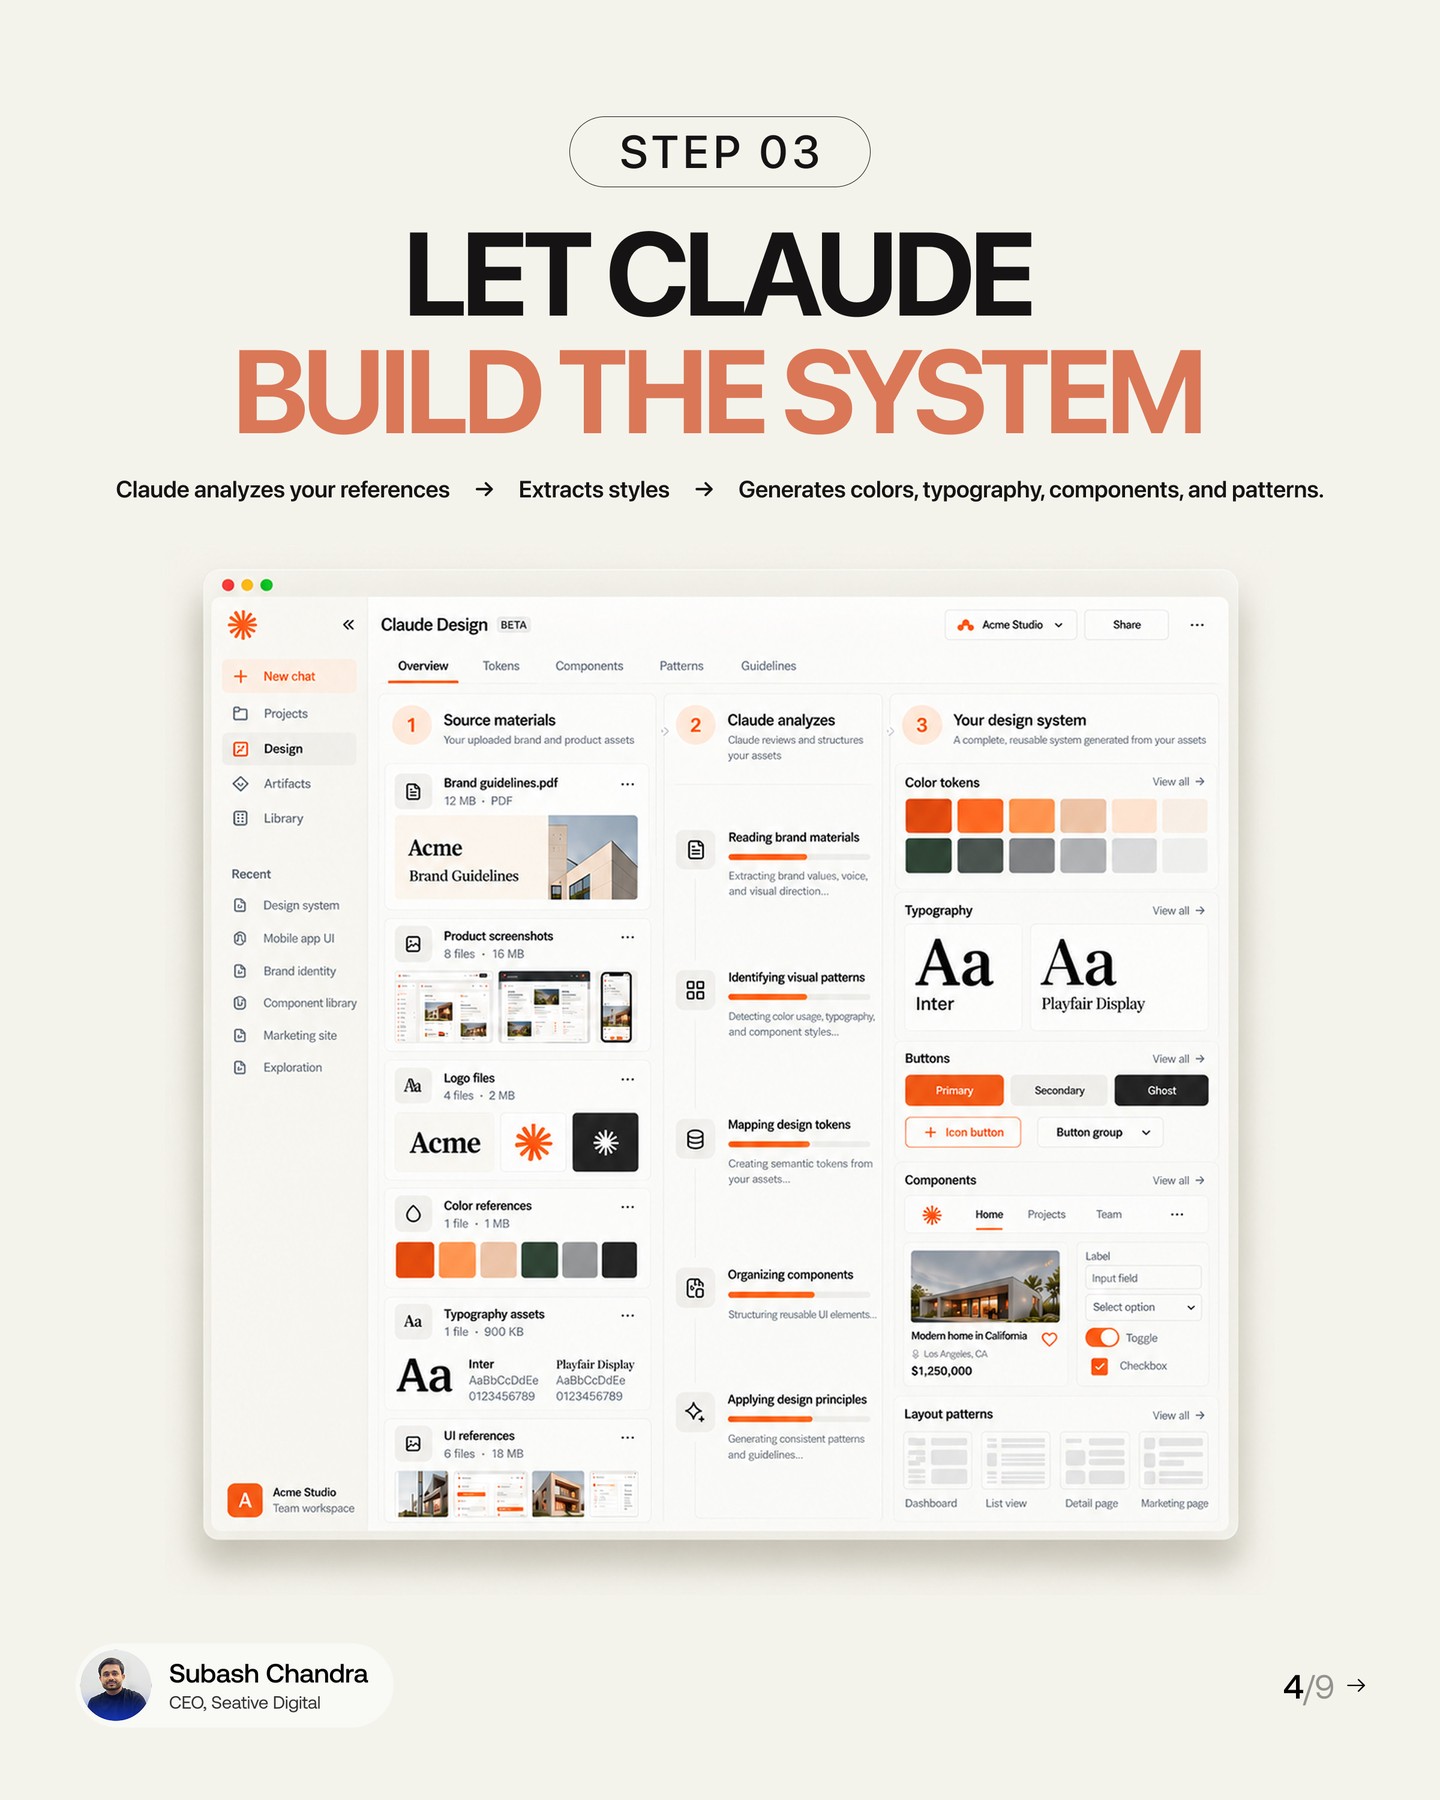
Ask Claude Design to analyze the references and produce a first pass at colors, typography, components, and patterns. A generated system is a proposal, not a finished source of truth. Keep the request concrete: describe the product, primary users, core screens, and any non-negotiable accessibility or brand constraints. This makes it easier to trace a generated choice back to the inputs and catch unsupported invention.
Step 4: Review each part of the result
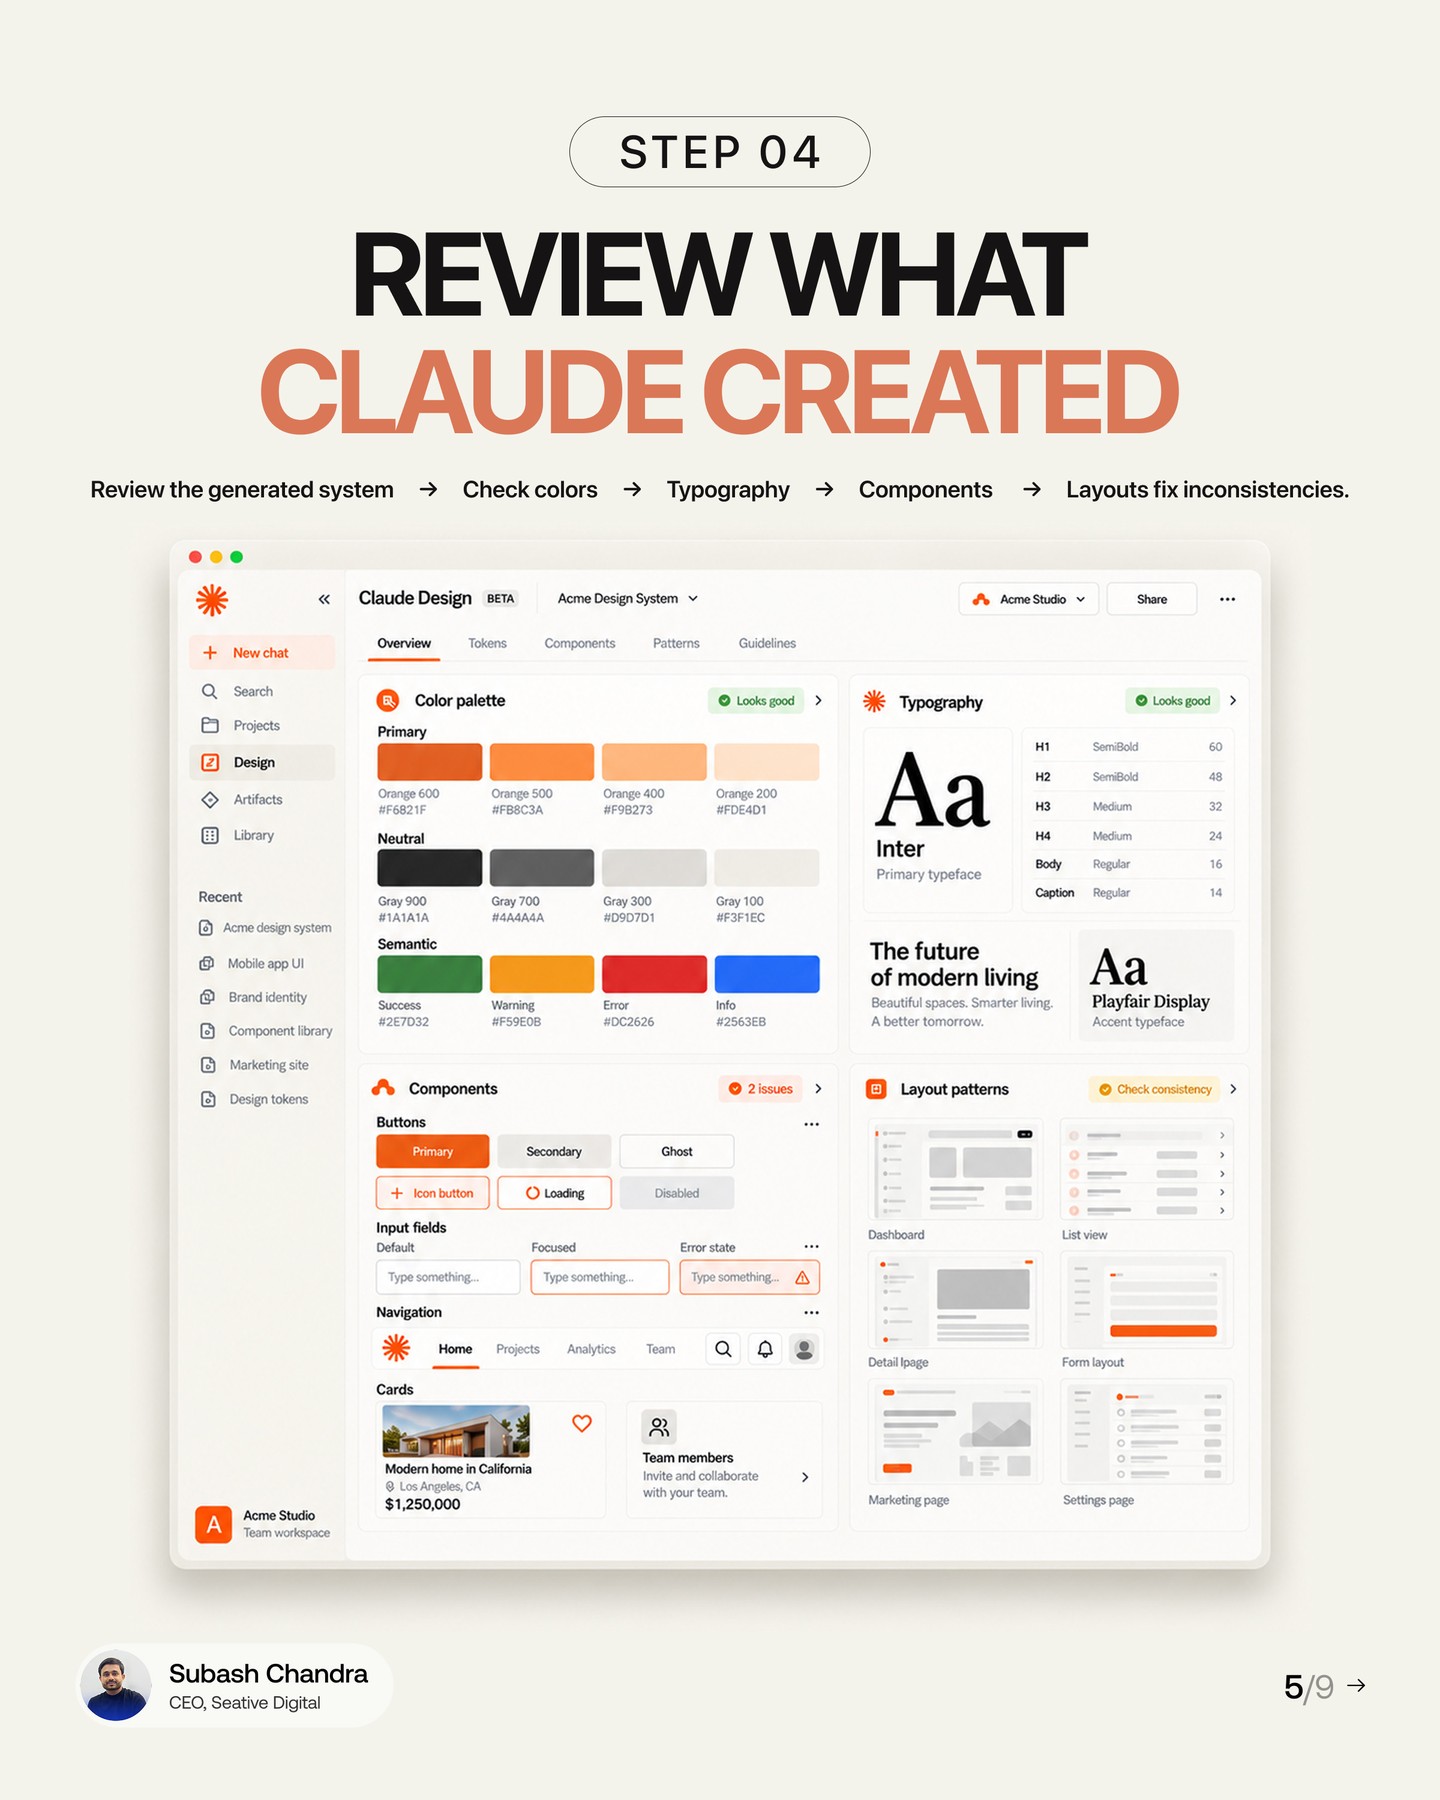
Inspect color contrast, text styles, spacing, component variants, and naming. Confirm that colors serve clear roles and that semantic states are distinct. Look for inconsistent button hierarchy, missing disabled or error states, and typography that becomes hard to read at small sizes. Compare the generated components with the uploaded references, and reject anything that conflicts with a documented product rule.
Step 5: Test it on a real project screen
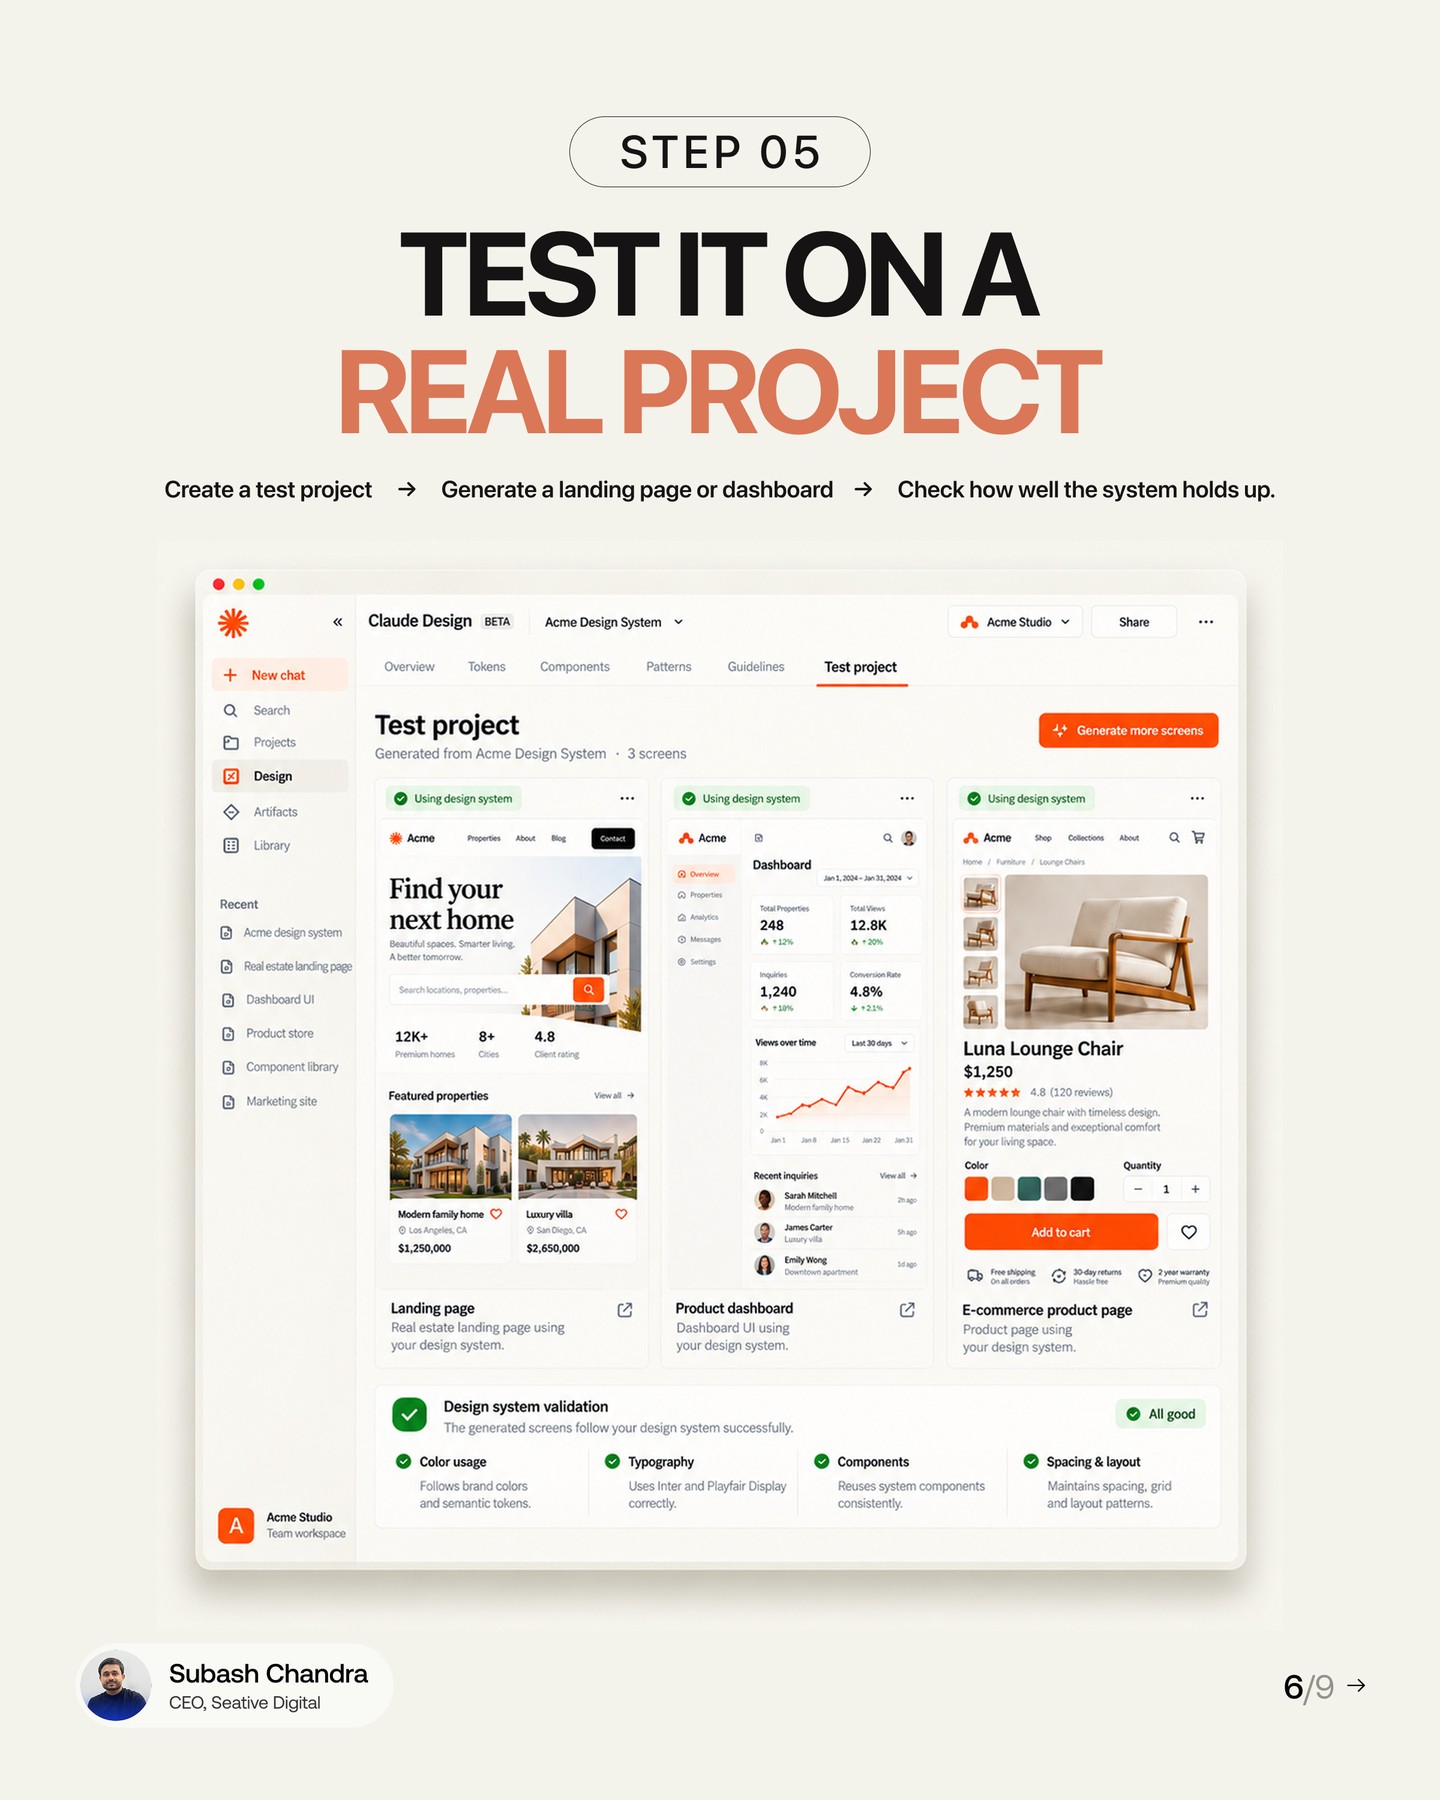
The carousel recommends creating a test project, such as a landing page or dashboard, then checking whether the system holds up across screens. Pick a representative flow with more than one type of content. A landing page alone may not expose data density, form states, or navigation problems. Test responsive behavior and at least one error or empty state. Record issues by token, component, and screen so fixes are actionable.
Step 6: Publish only after review
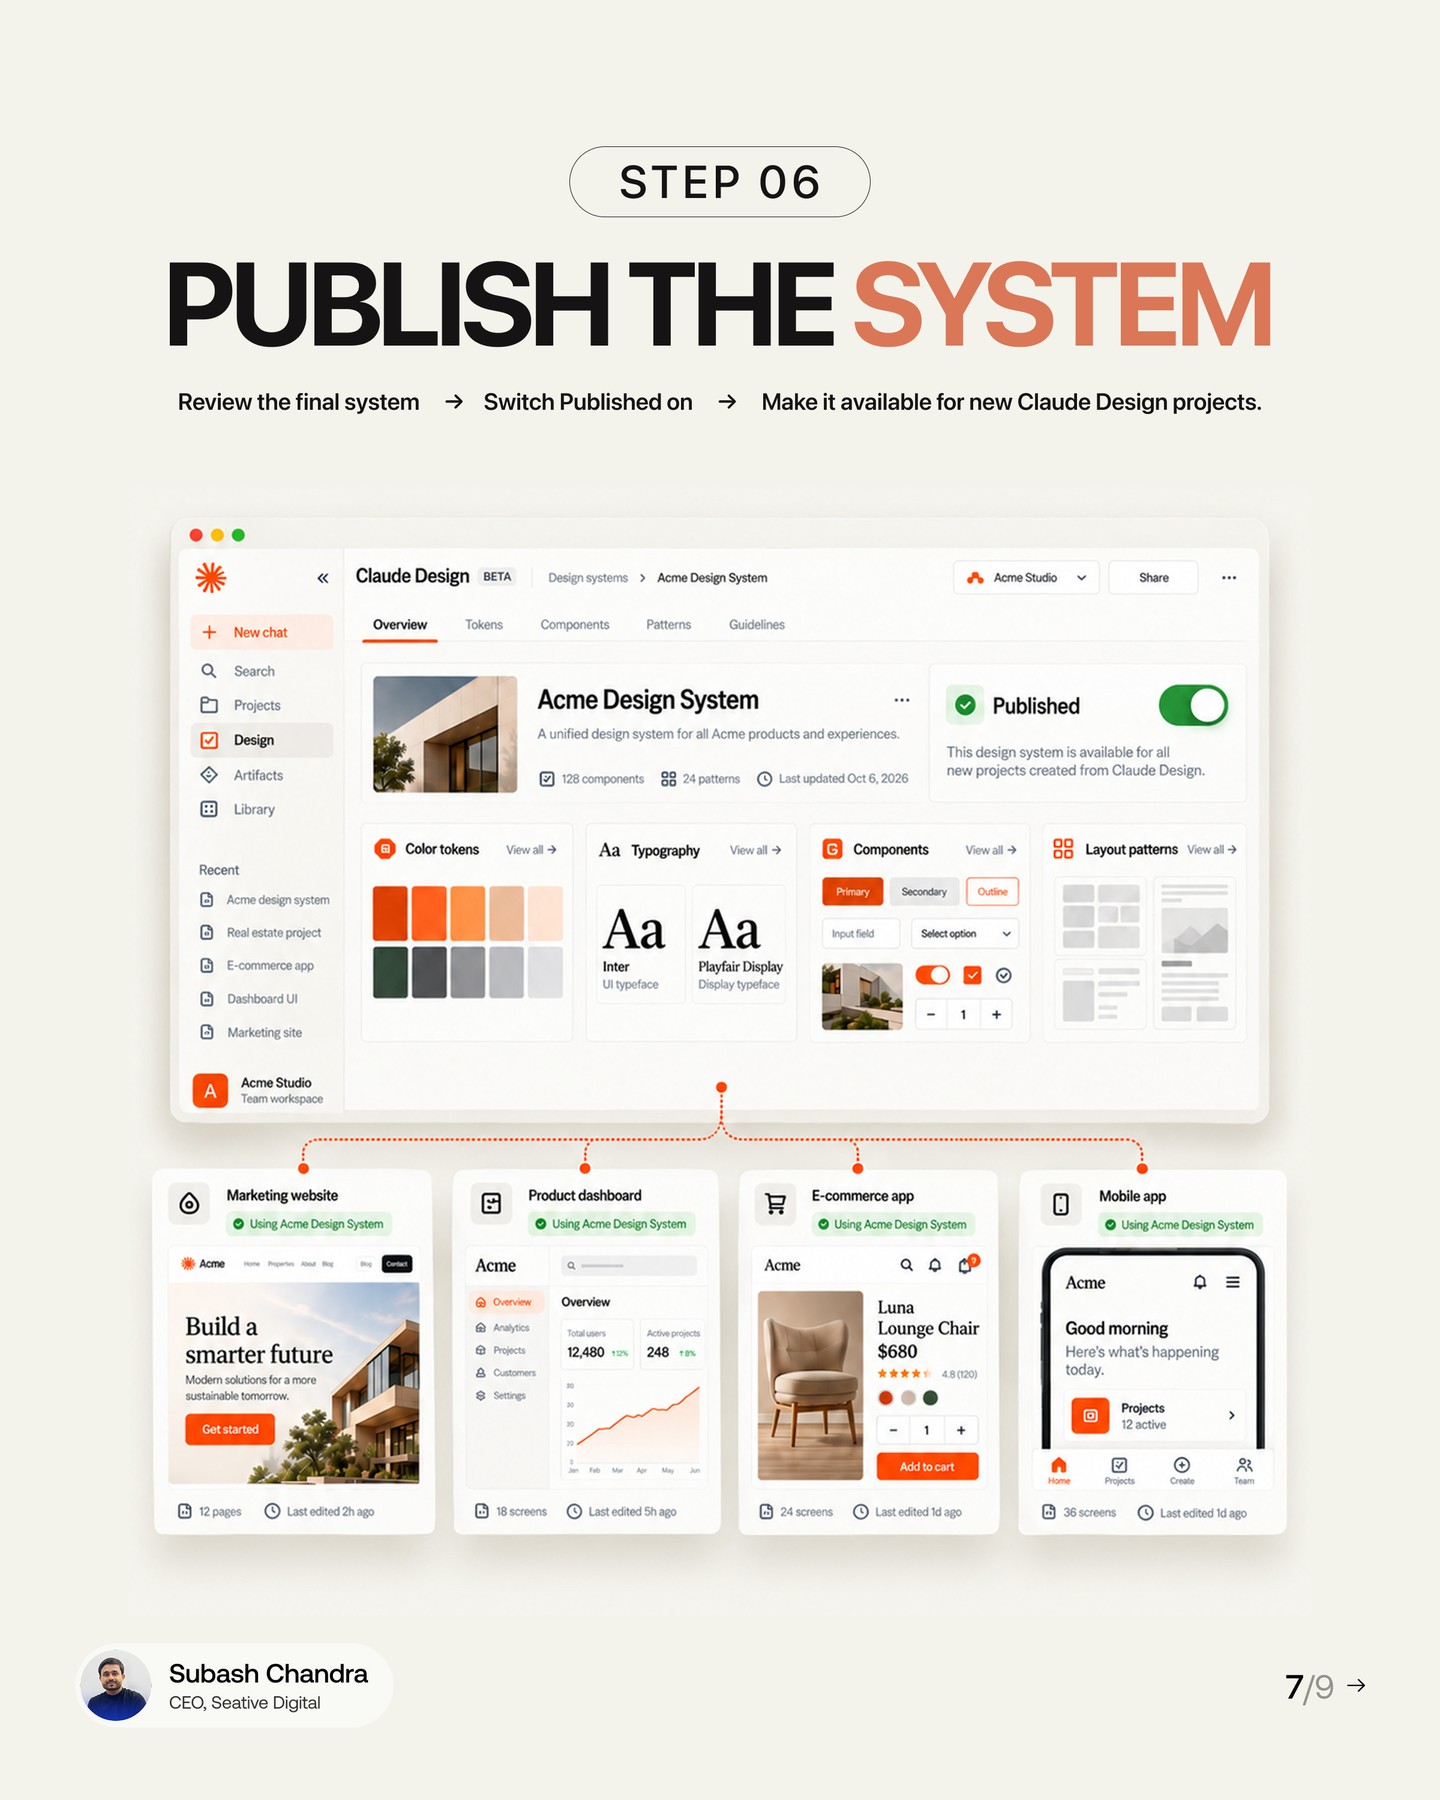
Publishing makes the system available for new Claude Design projects, so treat it as a release. Confirm the name, version, intended audience, and review owner. Make sure unresolved issues are documented and that a teammate can identify which system to use. If the product supports a draft or preview state, use it before making the system the default for new work.
Step 7: Remix and improve as the product changes
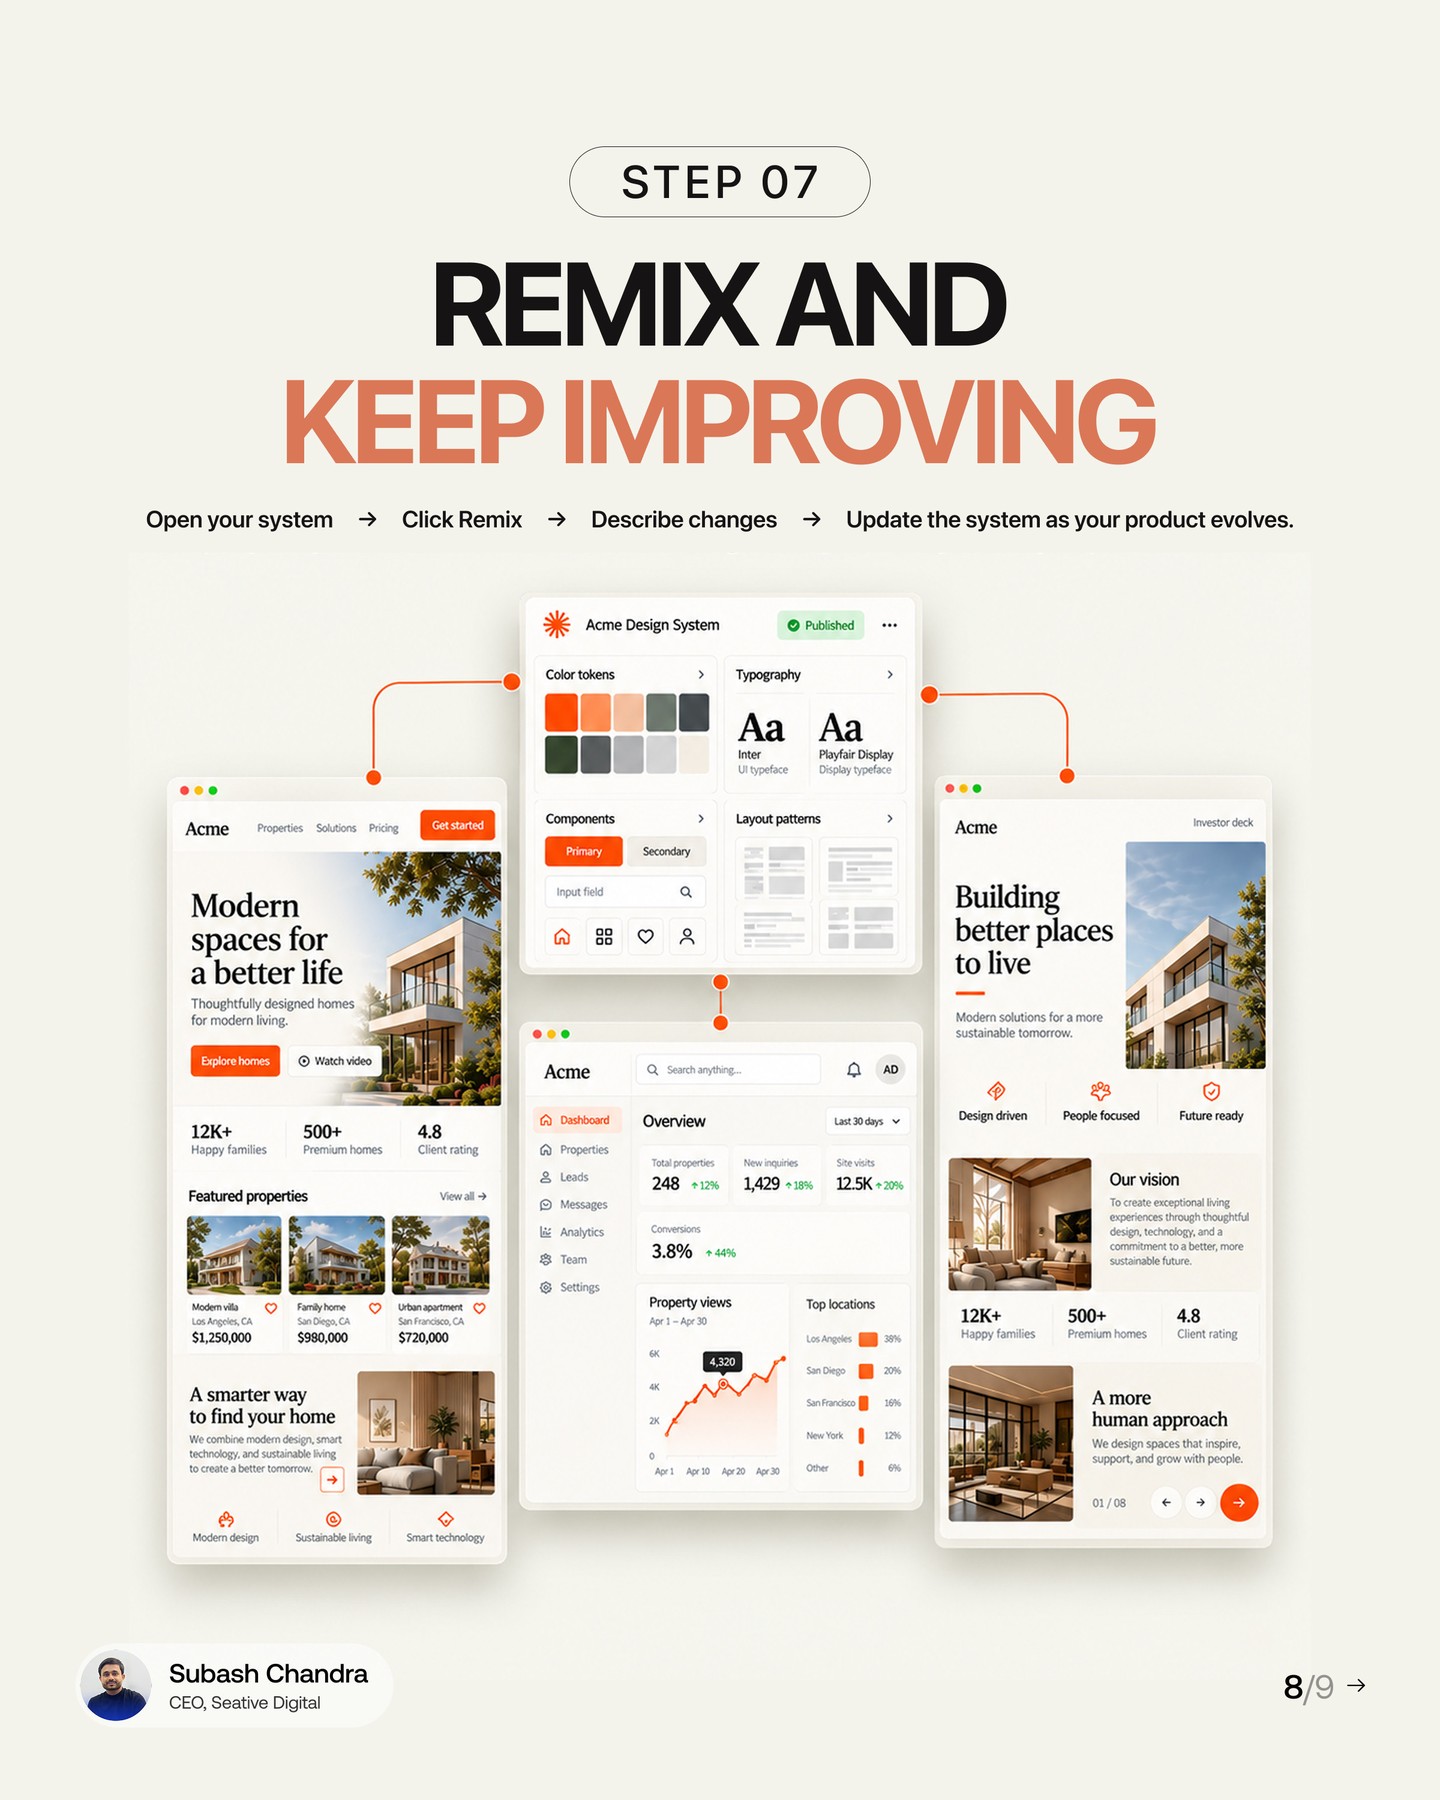
A published system should evolve with the product. The carousel shows reopening and remixing a system to update it. Gather evidence from new screens, user feedback, accessibility checks, and implementation constraints. Update shared tokens deliberately, and tell teams what changed. Avoid changing a foundational color or component behavior without checking existing use, because a small system edit can affect many interfaces.
A repeatable review checklist
Before publishing, answer these questions: Are the references approved and current? Can every token be explained by a brand or usability need? Do components cover the states teams actually use? Does the system work on both a content-heavy screen and a simple screen? Have contrast and responsive behavior been checked? Is there a clear owner for future changes?
For a hands-on trial, choose one screen from the product and one meaningful task, such as creating a dashboard table or setting up an account. Generate the system from relevant references, apply it, and ask a designer and an engineer to review the result. Capture gaps in a short issue list rather than repeatedly regenerating the entire system. Small, traceable changes are easier to evaluate.
Keep human judgment in the loop
AI can accelerate synthesis, but it cannot infer every business rule, accessibility requirement, or reason an existing interface behaves a certain way. Treat generated systems as structured drafts. A person should own approval, especially for shared libraries or systems used across products. Keep source assets organized, remove outdated references, and revisit the system when the product changes.
This article adapts the carousel by uiux.subash. See the original Instagram post for the visual walkthrough.
Related on NewForm
Keep reading

Find Your Stack
Discover the perfect design tools for your workflow.
Take the 60-second quizNewForm Studio
Turn your designs into professional mockups instantly.
Open StudioMore from NewForm
Best AI App Builders for Designers in 2026: What to Choose for Real UI Work
Compare Base44, Lovable, Bolt, v0, Replit and Framer for design fidelity, control, real app behavior and pricing. A transparent evaluation guide for designers.
9 min read · Oct 30, 2026

How to Use Adobe Firefly AI Assistant to Restyle a Portrait
A practical, art-directed workflow for exploring portrait styles with Adobe Firefly AI Assistant, from the source photo and prompt to reviewing and refining variations.
4 min read · Oct 30, 2026